You’ve probably been browsing through search results as to what to do next after purchasing a domain. Most of your search phrases would most likely read “I bought a domain name, now what”.
Well, consider this blog post the right scratch to your itch. We already know the confusion that often arises after registering a domain name. Most times, you’ll be totally unaware of the next step to take, which often lead to some people abandoning the entire process.
In this blog post, we are going to go into precise details on the necessary steps to take immediately after purchasing a domain name.
That’s not all, we’ll also be recommending a good web hosting service, as well as tell you how to properly link your domain name to your hosting service, how to choose the right theme and building your WordPress blog or website.
But before we go into the details and steps to take after buying a new domain name, do you know what a domain name is?
What is a Domain Name?
According to Wikipedia:
“A domain name is a label that identifies a network domain: a distinct group of computers under a central administration or authority. Within the Internet, domain names are formed by the rules and procedures of the Domain Name System. Any name registered in the DNS is a domain name.”
In other words, a domain name is the words that make up your website address. It is those words you type in the go-to search box of your browser that lands you on a website. Some examples of domain names include:
- hostingmonks.com
- bloggerspassion.com
While choosing a domain name, remember that whichever name you pick depicts the functions and content of your website or blog, which is why it’s important to go for a domain name that’ll properly represent your brand.
For example, seeing a domain name like myhealth.com automatically gives you the impression that this domain name revolves around the health niche. Therefore, keep that in mind while buying a new or expired domain name.
That said, let’s now move to the main discussion of today.
I Bought a Domain Name Now What | Steps to Take Next
Now that you already know what a domain is, it’s time to walk you through the next steps to take after buying a domain name.
Like I said earlier, I’ll show you all the necessary things to do in this step without leaving any stone unturned. The good thing is that the steps below are pretty simple and straightforward.
So if you’re still confused as to what to do next after purchasing a domain name, follow the steps below:
1. You need a web host [Compulsory]
You’ve taken quite an important step to buying a domain name so what you need to do next is link your domain name to a web host. Before we proceed, do you know what a web host is?
A web hosting service or company is responsible for the storage of your blog contents such as:
- Images
- Blog Posts
- Plugins
- Themes
- Videos
- Caches
In simpler terms, web hosting serves as a memory card to your website. There are a lot of web hosting companies online. But if you are skeptical as to which service to opt for, I’d advise you to opt for Bluehost as I use their services and I tell you, they are VERY GOOD.
And for the sake of this post, we’ll be using Bluehost for all our examples and analogies.
2. Connect your domain name to your web hosting service
Let’s say you opted for Bluehost web hosting service and you’re lost on how to link it to your domain name, well, calm down, we are going to do it together.
Many online newbies might find coding somewhat difficult but ease up as you only need to follow a stepwise process that I would be laying down below. Are you ready? Good, let’s go.
Step 1: Visit Bluehost
Go to the Bluehost website and click on Get Started Button
Step 2: Select a hosting package

For starters, you should go with the basic package if you will be handling one website but if you are handling more than one, you can opt for the higher package.
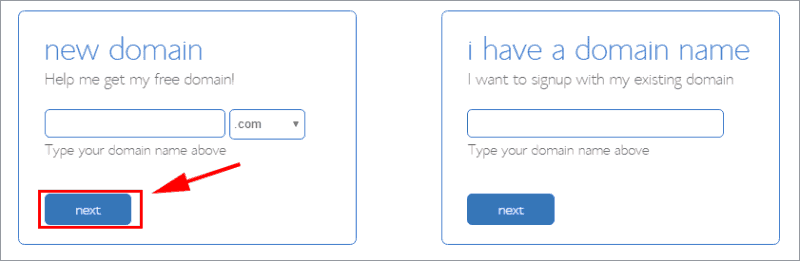
Step 3: Choose a domain name for your hosting account
You don’t need to purchase another domain name as you have bought one already so go ahead and click next.
I’d advise you name your hosting account with your domain name to avoid probable future complications:
Step 4: Generate your web hosting account
This step is quite easy as you would only need to pick the package you want and the name for your hosting account which you’ve initially done. You also need to add your personal details and pay. Payment is done via credit cards or PayPal:

I’d advise you to opt for longer contracts as you would save more money doing so.
For instance: If you opt for the Bluehost basic hosting package, then you will be paying $1.99 to get your website hosted for the next 36 months.
But if you choose to opt for the monthly plan, you will be paying $3.99:

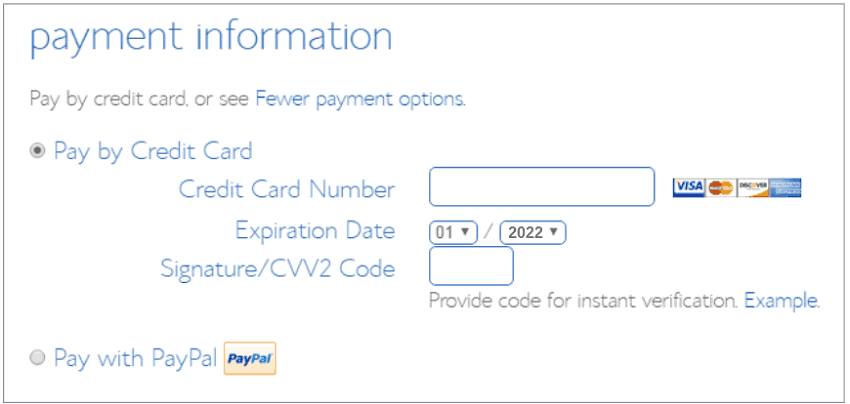
For you to pay for your hosting, use your credit card or choose to pay with PayPal by clicking on the more payment options:
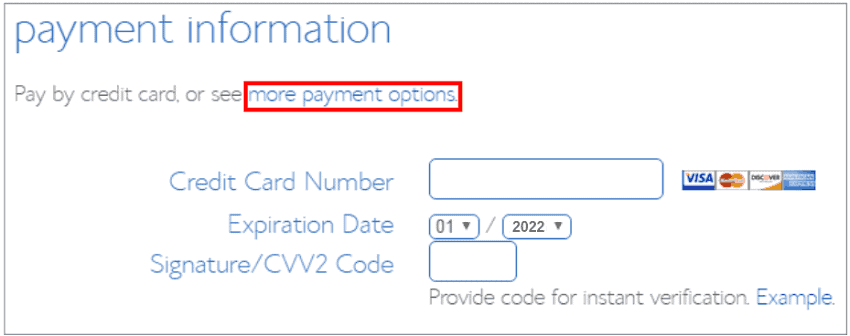
This is what the payment page should look like.
Or the PayPal page if you decide to pay with PayPal:
After you’ve chosen a payment method, accept the terms and conditions, submit and proceed further.
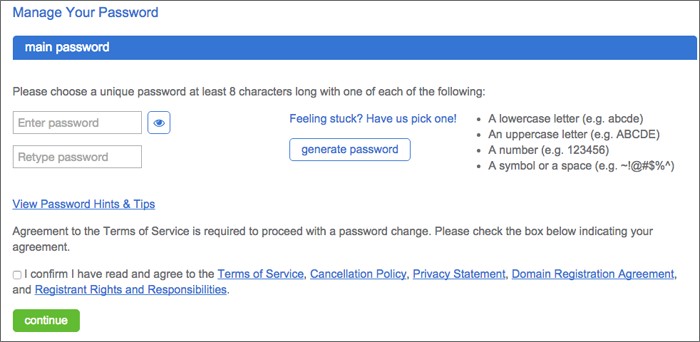
Step 5: Generate a password
The next step is to generate a password for your hosting account, you can allow the password generator to generate one for you or you can do that yourself. Be sure you create a password you can easily remember. If possible store it on a notepad:
When creating your password, ensure you combine upper and lower case letters and characters, this makes it difficult to hack or guess:
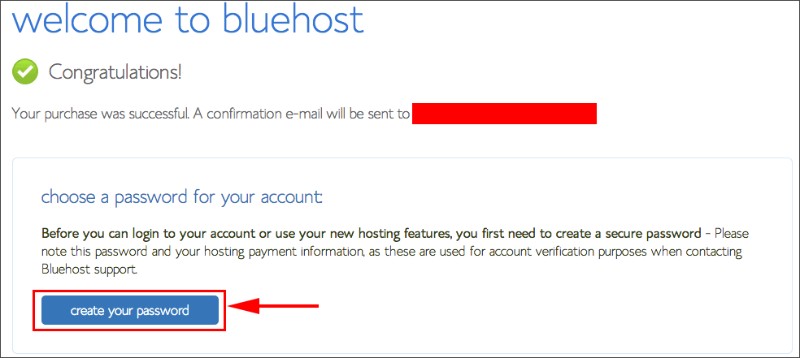
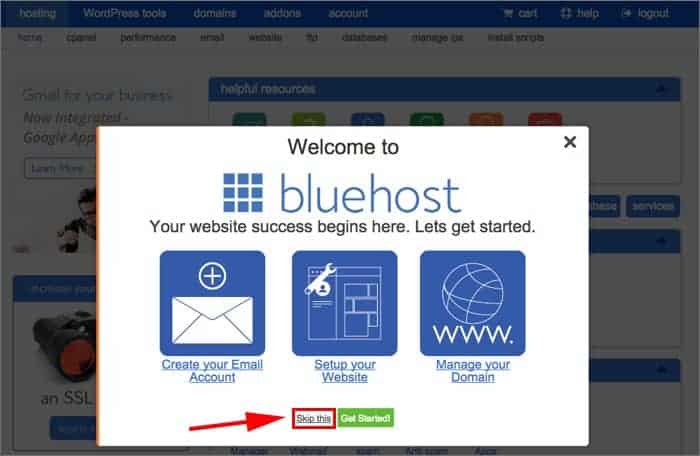
Step 6: Log-in to your Bluehost account
Upon creation of the password, an email would be sent to you by WordPress, asking you to confirm your account. This email comes with your username and password. Now use your username and password to login at login.bluehost.com
The first time you log into your cPanel, you will be greeted with a welcome message and suggestions to guide you. Politely decline this offer:
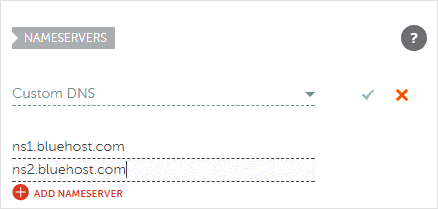
Step 7: Rerouting the domain name to the hosting account
You should pay attention to this!!!
For your domain name to be rerouted to your Bluehost hosting account follow these steps:
Add the details of Bluehost nameservers. This is present on the Custom DNS nameserver field which your domain registrar presents on its cPanel:
Step 8: Choose a domain for your cPanel account
Also an important step!!!
After rerouting your domain name to your hosting account, you should ensure that it is properly pointed, if everything goes well, congrats:
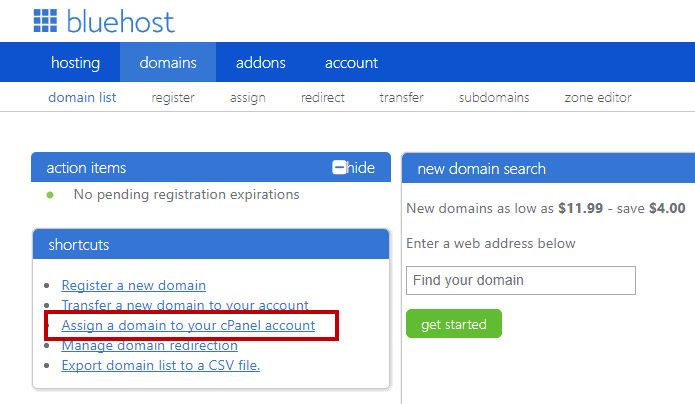
Now, assign your domain name into your cPanel so that the system can create a folder on your hosting platform, set to install your website.
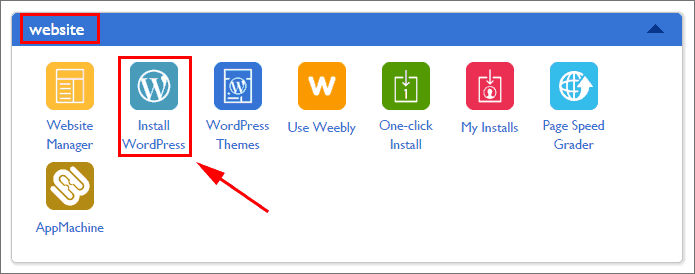
Step 9: Click on the ‘Install WordPress’ button
While you are still logged into the c-panel account, scroll down to the website options and click on the ‘Install WordPress’ button:
Step 10: Click on ‘Install WordPress’
The previous step will redirect you to Mojo Marketplace website, where you can easily have your WordPress installed.
Click on the Get Started button at the down right side of the page.
Step 11: Pick the domain on which you want the WordPress installed
In this step, you link the domain name you initially registered to WordPress
You will be presented with two options:
It is left to you to add www to your domain name or not. The choice is entirely yours to make as it bears no implication of any kind:
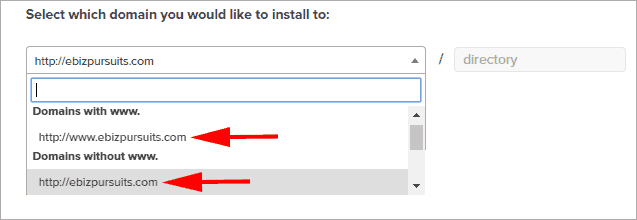
After choosing an option, click Next.
However, if you want to install WordPress, ensure you leave the directory box blank:

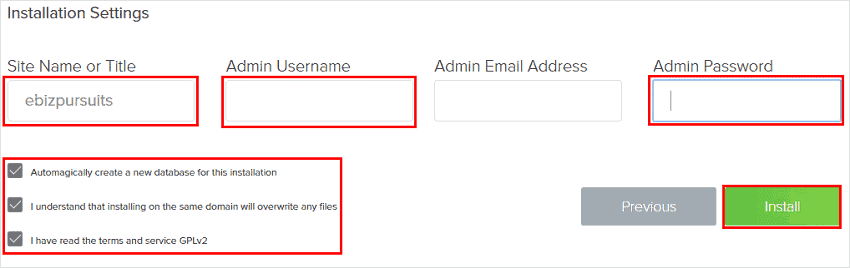
Step 12: Create your WordPress log-in username and password
In this step, you will need to create your WordPress username and password. This would be your log-in details to your backend office. It is via this backend office that your blog would be managed.
Remember to tick “I have read the terms and conditions of the GPLv2.”
Step 13: Concluding installation
When the previous step has been done, you would see a notification banner that reads ‘Installation Complete’:

Step 14: Now log-in to your brand new website
There are several other things you need to fix to give your website an exquisite look, come on! Every new house needs a set-up.
For this kind of set-up, you need to access some tools. To access these tools, you need to type in your domain name followed by /wp-admin.
For instance, if your domain is andyjames.com, go to bloggerspassion.com/wp-admin. This would load a WordPress log-in page:
Now, just type in the WordPress username and password you generated in Step 10, and you will be welcomed by WordPress, with an offer to help out but as usual, we always say no:

Step 15: Time to remove unwanted Plugins
Plugins are software packages that aid the functionality of your website. They are already created so you don’t need to write code.
Some plugins are free while others need to be paid for.
Your new site should automatically have some pre-installed plugins.
You can also remove the plugins that are not necessary and install the ones you need
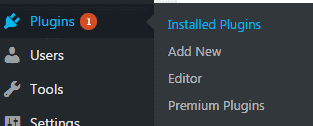
Navigate to Plugins as you can see in the image below:
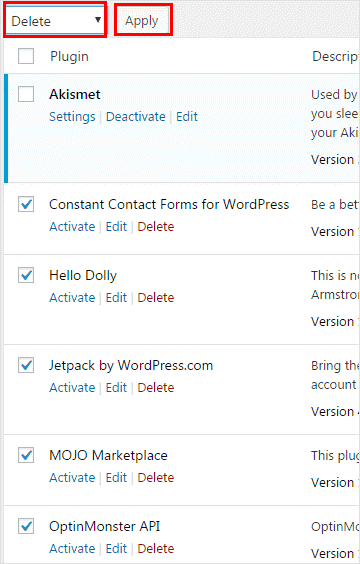
If you want to delete a Plug-in, select the plugins you wish to delete choose Deactivate from the drop-down menu and click Apply.
From the drop-down menu, choose Delete and click Apply:
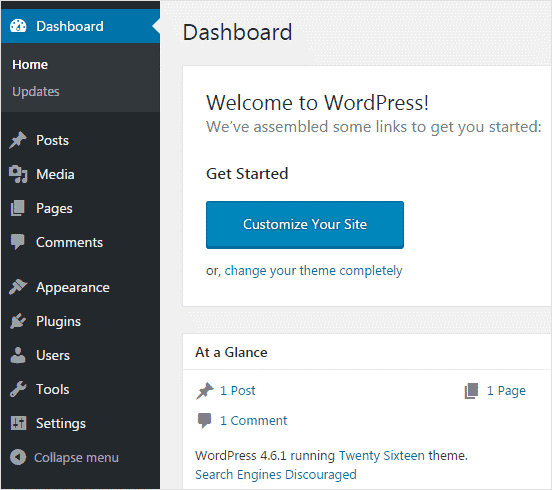
Once you’ve deleted unwanted Plugins, your dashboard would look free and spacious.
Take a look:
Choosing the Right WordPress Theme
There are a lot of themes you can use with your WordPress website but the best theme to consider using is Elegant themes which can be gotten at Elegant Themes. Elegant themes can be found in the home of Divi, the most popular page builder in the world.

The Elegant Themes membership is a very good deal for WordPress users. You won’t find a better deal anywhere on the internet. For just $89 per year, you can build as many websites an array of vast options. These options include commercial projects too.
With a one-time payment of just $89, you can transform your website into a lifetime business.
Why Opt for Elegant Themes?
Elegant Themes is a leading figure in WordPress development. They have been building WordPress Themes for 8 years and operate one of the largest customer bases of most companies in the market. Their designs are beautiful, functional and affordable. Paying $89 for a year is quite a jaw-dropping deal.
Multi-functionality
You are free to use elegant themes on as many websites as you deem fit. You aren’t restricted to any number of themes or websites to use them on as you are allowed to pick from an array of options.
You can also get a refund if you are not satisfied
One feature about elegant themes that protects every customer’s interest is their refund policy that states that upon dissatisfaction, every customer or client can send email for a refund. But asking is highly unlikely as their services are always meeting the needs of their customers.
You can upgrade anytime you deem fit
Upon registration, the option to upgrade from a personal plan to a business is always available.
Here’s a sample of what their theme look like:

Building Your WordPress Blog
Now you have bought a domain name, purchased a web hosting service and gotten a very good theme for your blog, well, what next?
You should understand that when it comes to blogging, consistency is key as you have to upload contents every day. Your contents should revolve around your niche and should be focused on providing value.
Apart from that, you also need to set up all the important pages that’ll complete your blog. Some of these pages are:
About Us Page
This part of the blog describes the niche of your blog and what it is all about. Your services should be described on this page.
Contact Us Page
Endeavor to leave a means to be gotten back to on your blog. You should probably sign up for a business email address as it isn’t advisable to use your personal email address for business. Your email address should contain your domain name.
Others are the “earning disclaimer” and “privacy policy” pages.
Monetizing Your Blog
If you plan to monetize your blog which is often the case, you should have plans as regards building your email list as these subscribers would serve as your clients and customers whom you would most likely be selling to.
There are several ways you can monetize your blog but the primary ways most bloggers explore are:
Google Adsense
Monetizing your blog with Adsense often involves allowing ads to run on your blog. Most blogs qualify for Adsense after they’ve attained a certain amount of traffic or followership.
Most ads often use a pay-per-click medium of payment, that is, anytime someone clicks on an ad that is running on your blog, you get paid a particular amount.
Affiliate Marketing
Monetizing your blog via affiliate marketing often involves selling a product on your blog and earning a commission. Before you opt for this kind of monetization, you should ensure that whatever you are selling is in tandem with your niche.
For instance, if you are blogging on men’s health, you can sell products on men’s health on your blog.
Affiliate marketing usually thrives with a good amount of traffic and an email list. Building an email list is probably the best kind of way to have profitable traffic as you are quite certain that your subscribers are likely to buy your products.
So upon creation of a blog, building an email list should be your utmost priority.
Browse More:
- Hostinger Coupon Code India 2026: How to Get Upto 90% Discount?
- How to Check Website Status to Know if its Up and Running?
- How to Get First Month Free Hosting without Credit Card?
- How To Check Domain History with Free Domain History Checkers Tools?
I Have a Registered Domain Name Now What | Conclusion
There you have it all – we’ve covered the most important aspects of creating a blog/website, but you need to understand that there are lots of other moving parts involved, so keep on learning!
If you follow all the instructions laid down here and approach the process religiously and with patience, you’ll find it a lot easier! With time, you’ll be able to build websites in less time.
If you don’t like Bluehost, Siteground is also another wonderful web hosting company you can use to host your sites.
Finally, leave a comment below if you have questions regarding this article, and we’ll do our best to reply you as soon as possible.

![How to Get a Free .Com Domain for 1 Year? [7 Ways For 2026]](https://hostingmonks.com/wp-content/uploads/2023/11/how-to-get-a-free-domain.png)
![Top 10 First Month Free Web Hosting in 2026 [No Credit Card]](https://hostingmonks.com/wp-content/uploads/2021/12/first-month-free-hosting.jpg)